Active Sitting · A hands-on approach to lower-back practice
Your Back Has Had Enough Say in Your Plans. Discover the Hands-On Method That Starts in a Chair.
For men and women tired of sitting out ordinary life: see a different way to begin a lower-back practice, using your own hands and seated movements at home.
An article from Active Sitting · Instructor: Conrad Kovach
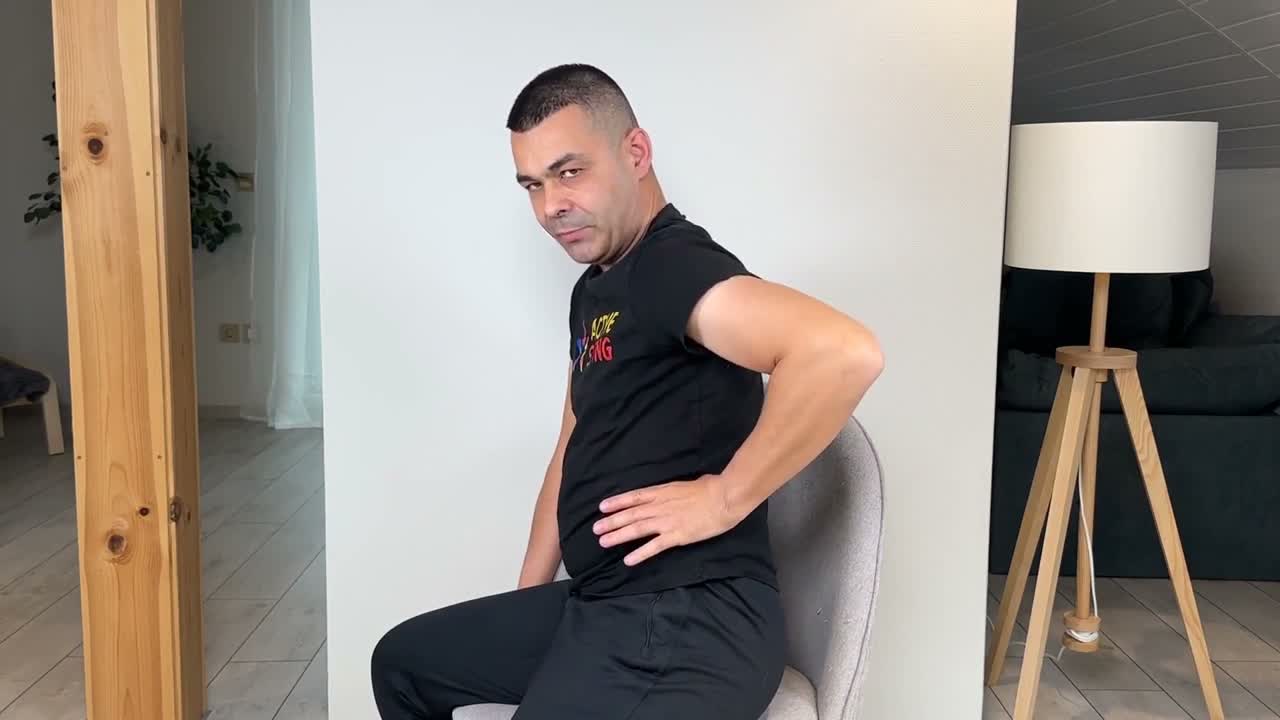
A chair may be the last place you expect to begin a movement practice. Here, it is where you start learning the actions.
See the seated practice belowYou want to go with them.
Your shoes are by the door. Someone asks if you are coming. Before you answer, you want to know how far they plan to walk and where you could sit down.
The part you miss is ordinary: walking beside someone, joining the conversation, leaving the house because you want to. You would like your next yes to be about the plan itself.
That is a reason to look for a different approach. The useful question is what it actually asks you to do.
The change is in what you do in the chair.
You may already have a cushion, a better chair or a stretch you return to. Active Sitting introduces a hands-on practice: you learn where to place your hands, how to work around the points taught in the course and how to follow the seated movements.
The first sequence includes work around the torso and seat, then movements involving the hip and foot. You participate in the practice yourself. The instructor demonstrates on his own body so you can see the position and action together.
Think about learning a knot. A finished picture can leave you guessing. Watching where the hands go makes the instruction concrete. That is what the lesson below lets you inspect before making a purchase.
Inside the actual course
Watch what you would learn to do yourself.
Conrad works around the points introduced in the course, then demonstrates movements involving the hip and foot. Look at his hand placement, the position of the chair and the pace of the instruction.
Day 2 lesson preview · English instruction · 3 minutes 56 seconds. This is a demonstration of the practice, not a before-and-after result.
Watch first. If you choose to follow along, begin with the course introduction and read the lesson guidance. Ask your clinician if you are unsure whether a movement is appropriate for you.
Could you follow the instruction?
That is something this video lets you judge. You can see the reaching and positioning involved, and pause a detail you want to understand. The next question is how to learn the wider routine and keep using it.
The video could not load. Open the preview directly.
A saved exercise and a practice you understand are different things.
A useful stretch, a treatment appointment or a change of chair may already have helped you. You can value that and still want something you know how to practice yourself at home.
With a saved clip, the unanswered questions often come afterward: Where does this fit? What should I learn first? Which part do I return to tomorrow?
Active Sitting puts the instruction into a path. You begin with your own starting observations, learn the actions and work through the later lessons. You have a place to return when a movement needs more attention.
The reason to consider it is practical: you want to learn the approach well enough to give it a place in your day.
Look at what the practice asks of you.
The preview shows the instructor reaching around his torso, working with his hands and moving his hip and foot. You can watch without following along. If reaching or positioning is difficult for you, that matters when deciding whether the format is suitable.
You also need time to learn. Day 2's video runs for about four minutes; the written lesson suggests allowing about ten minutes for that practice. Your first session includes the Day 1 introduction and self-check, and may take longer.
If you have a diagnosed condition, recent surgery or injury, or are unsure about a movement, ask your clinician first. This course cannot assess your individual situation.
Keep the ordinary thing you want back in view.
For you, that may be the family walks you have been missing. It gives the practice a purpose beyond checking off another video.
The course begins with three check-in points on the left and right: six observations to record. Later, you return to the same check. Alongside those notes, you can write down what you attempted in an ordinary day and what still felt difficult.
A record makes room for improvement, no change and a difficult day. The demonstration shows what is taught; it cannot tell you in advance what your own experience will be.
Learn the method with a next step already laid out.
The Active Sitting 21-Day Routine brings the lower-back-focused lessons together. You get the demonstrations and written guidance in the order used by the course, from the first check through the later comparison.
Your own starting point
Day 1 introduces the self-check: three points on each side, six observations to record. Keep your notes on paper if you prefer.
See where your hands go
Day 2 brings the hand placements and hip and foot movements together. Pause, read the written steps and take time to understand the setup.
Give each lesson a place
Learn the later movements in order. Day 7 brings an introductory routine together; return to the demonstrations when a detail is unclear.
Return to your own notes
Day 19 revisits the starting self-check. Day 21 provides a written Flare-Day Plan to consult alongside the course guidance.
The day numbers organize the material. You can revisit a lesson; they do not promise that your back will be pain-free by a particular day.
See the Full 21-Day Routine Course contents, current price and purchase detailsWhat are you buying beyond the first video?
The wider instruction. Later lessons introduce more of the lower-back-focused practice, including movement sequences and positions beyond this first demonstration.
A way to return to the details. Written steps sit alongside the lessons, so you can check an instruction without trying to remember it from a passing clip.
A path beyond the first attempt. The starting self-check, later comparison and written Flare-Day Plan give you specific reference points within the program.
You can keep your notes on paper. The printable tracker and wider Complete System are optional purchases, not requirements for the Routine.
The Active Sitting 21-Day Routine
Bring the instruction home.
You have seen the hands-on format. The next page lets you inspect the full course, see what is available as video or written guidance and review the current one-time price.
Your purchase has a 90-day refund policy. Read the terms before deciding.
See the Full 21-Day Routine This opens the offer. It does not place an order.Think about the next time someone asks if you are coming.
You have a reason to want things to change. Now you also have a concrete way to look at Active Sitting: the action, the instruction and the path for learning it.
If this is an approach you want to explore, take a look at what the Routine includes. Make the decision with the actual course in front of you.
Explore the Routine and Current Offer